
Documentation > Basic Tutorials > Stateful NAT64
Stateful NAT64 Run
Index
Introduction
This document explains how to run Jool in Stateful NAT64 mode. Follow the link for more details on what to expect.
I don’t want to have to maintain three almost identical tutorials (it’s a surprising amount of work), so please read the traditional SIIT tutorial first. You don’t need to follow it; just make sure you generally understand all the remarks.
Sample Network

Again, all the remarks in the traditional SIIT’s Sample Network section apply here.
Nodes A through E:
user@A:~# /sbin/ip link set eth0 up
user@A:~# # Replace "::8" depending on which node you're on.
user@A:~# /sbin/ip address add 2001:db8::8/96 dev eth0
user@A:~# /sbin/ip route add 64:ff9b::/96 via 2001:db8::1
Nodes V through Z:
user@V:~# /sbin/ip link set eth0 up
user@V:~# # Replace ".16" depending on which node you're on.
user@V:~# /sbin/ip address add 203.0.113.16/24 dev eth0
Notice these nodes do not need a default route. This is a consequence of them being in the same network as the NAT64; T will be masking the IPv6 nodes, so V through Z think they’re talking directly to it.
Node T:
user@T:~# /sbin/ip link set eth0 up
user@T:~# /sbin/ip address add 2001:db8::1/96 dev eth0
user@T:~#
user@T:~# /sbin/ip link set eth1 up
user@T:~# /sbin/ip address add 203.0.113.1/24 dev eth1
user@T:~#
user@T:~# /sbin/sysctl -w net.ipv4.conf.all.forwarding=1
user@T:~# /sbin/sysctl -w net.ipv6.conf.all.forwarding=1
Make sure T can ping everyone before introducing Jool into the mix.
Jool
As with vanilla SIIT, all a minimal Stateful NAT64 needs is the translation prefix.
If you followed the SIIT tutorials, do keep in mind that the names of the NAT64 binaries are jool, not jool_siit:
user@T:~# /sbin/modprobe jool
user@T:~# # Please remember: This assumes you're using the packages feed.
user@T:~# # If your Jool version is 3.5.7, you shouldn't be here!
user@T:~# insmod jool_common
user@T:~# insmod jool
The same applies to the userspace clients:
user@T:~# jool instance add "example" --netfilter --pool6 64:ff9b::/96
user@T:~# jool instance add "example" --iptables  --pool6 64:ff9b::/96
user@T:~#
user@T:~# /sbin/ip6tables -t mangle -A PREROUTING -j JOOL --instance "example"
user@T:~# /sbin/iptables  -t mangle -A PREROUTING -j JOOL --instance "example"
Testing
Remember the FAQ and debug logging if something goes south. Do not try a 64:ff9b::X.X.X.X ping from the translator; it’s not going to work.
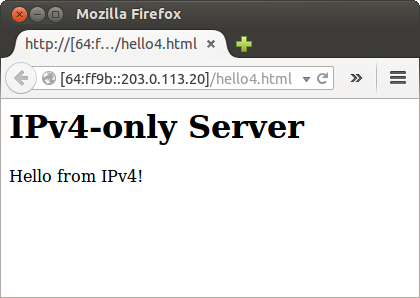
Test by sending requests from an IPv6-only node:
user@C:~$ ping6 64:ff9b::203.0.113.16
PING 64:ff9b::203.0.113.16(64:ff9b::cb00:7110) 56 data bytes
64 bytes from 64:ff9b::cb00:7110: icmp_seq=1 ttl=63 time=1.13 ms
64 bytes from 64:ff9b::cb00:7110: icmp_seq=2 ttl=63 time=4.48 ms
64 bytes from 64:ff9b::cb00:7110: icmp_seq=3 ttl=63 time=15.6 ms
64 bytes from 64:ff9b::cb00:7110: icmp_seq=4 ttl=63 time=4.89 ms
^C
--- 64:ff9b::203.0.113.16 ping statistics ---
4 packets transmitted, 4 received, 0% packet loss, time 3004ms
rtt min/avg/max/mdev = 1.136/6.528/15.603/5.438 ms
Obviously, users should not need to be aware of IP addresses, much less know they need to append a prefix whenever they need to speak to IPv4. The DNS64 document will tell you how to make the prefix-address-hack transparent to users.
Stopping Jool
Delete instance:
user@T:~# jool instance remove "example"
user@T:~# /sbin/ip6tables -t mangle -D PREROUTING -j JOOL --instance "example"
user@T:~# /sbin/iptables  -t mangle -D PREROUTING -j JOOL --instance "example"
user@T:~# jool instance remove "example"
Remove module:
user@T:~# /sbin/modprobe -r jool
user@T:~# rmmod jool
user@T:~# rmmod jool_common
Afterwords
- If you care about performance, you might want to raise
lowest-ipv6-mtu. - Please note that none of what was done in this tutorial survives reboots! Here’s documentation on persistence.
The next tutorial explains DNS64.